Two e2studio projects are provided, one that is pre-configured to use the Renesas compiler, and one that is pre-configured to use the GCC compiler.
Both RTOS projects target the RX64M RSK (Renesas Start Kit) evaluation board.
See also the FAQ My application does not run, what could be wrong?
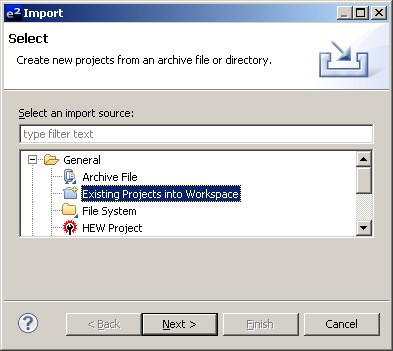
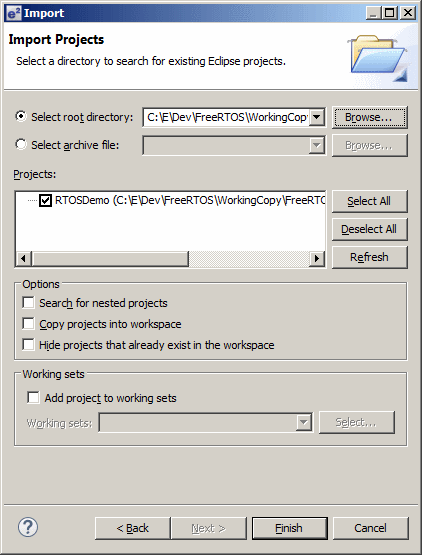
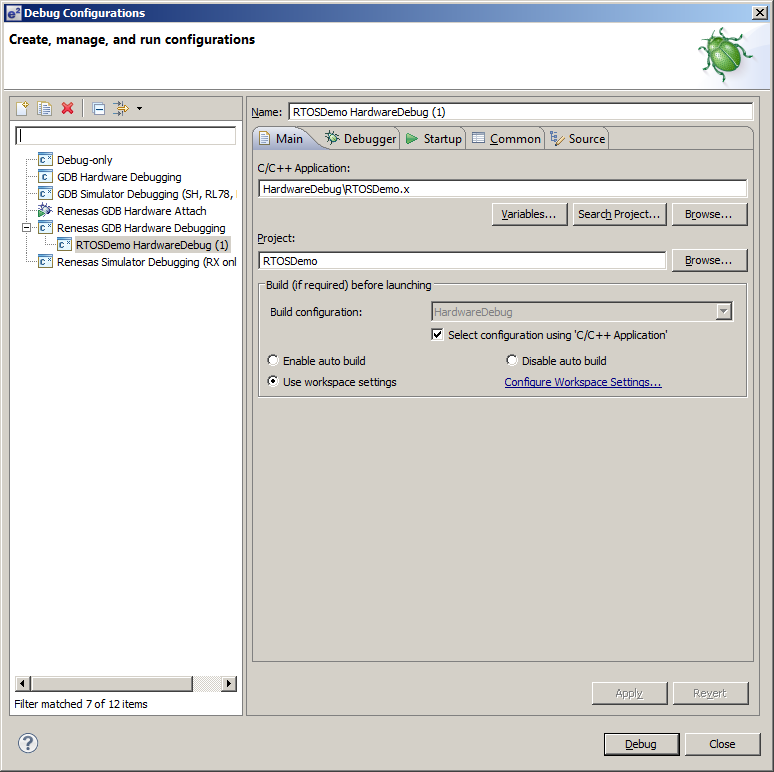
The e2studio projects have the usual Eclipse project name .project. The project that uses the Renesas compiler is located in the FreeRTOS/Demo/RX600_RX64M_RSK_Renesas_e2studio directory. The project that uses the GCC compiler is located in the FreeRTOS/Demo/RX600_RX64M_RSK_GCC_e2studio directory. These are the directories that must be selected when importing the projects into the Eclipse workspace.
The demos use the LEDs built onto the RSK development board, so no hardware set up is required.
|
|
|
|
main() calls main_blinky():
main_blinky() creates an RTOS queue, a queue send task, and a queue receive task, before starting the scheduler.
The queue send task is implemented by the prvQueueSendTask() function in main_blinky.c.
prvQueueSendTask() sends the value 100 to the RTOS queue every 200 milliseconds.
The queue receive task is implemented by the prvQueueReceiveTask() function in main_blinky.c.
prvQueueReceiveTask() blocks to wait for data to arrive on the RTOS queue. Each time the value 100 is received from the queue it toggles LED 0. As data is sent to the queue every 200ms, the LED will toggle every 200ms.
main() calls main_full():
main_full() creates a set of standard demo tasks, some application specific test tasks, and a pseudo randomiser task, before starting the scheduler. The pseudo randomiser task is just used to ensure some variation is added to the sequence in which the test tasks execute, and in so doing, improve the test coverage.
The reg test tasks test the context switching mechanism by filling each MCU register with a known value, then continuously checking that each register maintains its expected value for the lifetime of the task.
The "Check" task monitors the status of all the other tasks in the system, looking for a task either stalling or reporting an error. It toggles LED 3 each time it is called.
If the LED is toggling every three seconds then the check task has not detected any stalled tasks or received any error reports. If the LED is toggling every 200ms then at least one error has been found.
LED 0, LED 1, and LED 2 are controlled by the standard demo flash tasks. Each LED will toggle with a fixed but unique frequency.
This sets the frequency of the RTOS tick. The supplied value of 1KHz is useful for testing the RTOS kernel functionality but is faster than most applications need. Lowering this frequency will improve efficiency.
This defines the interrupt priority used by the RTOS kernel for the timer and software interrupts. This should always be set to the lowest interrupt priority, which is 1 for the RX64M. See the configuration pages for more information.
This defines the maximum interrupt priority from which RTOS API functions can be called. Interrupts at or below this priority can call FreeRTOS API functions provided that the API function ends in 'FromISR'. Interrupts above this priority cannot call any FreeRTOS API functions but will not be effected by anything the RTOS kernel is doing. This makes them suitable for functionality that requires very high temporal accuracy (motor control for example).
Often an ISR wants to cause a context switch so the task that is returned to when the ISR completes is different to the task that the ISR originally interrupted. This would be the case if the ISR caused a task to unblock, and the unblocked task had a priority above that of the task that was already in the Running state. This can be achieved by calling portYIELD_FROM_ISR(), which takes a single parameter. The parameter must be 0 if a context switch is not required, or non-zero if a context switch is required. portYIELD_FROM_ISR() is used in the examples below.
/* Pragma used to install the interrupt.  The 'enable' used in the pragma
tells the compiler to enable interrupts before executing the user code. */
#pragma interrupt ( Excep_PERIB_INTB128( vect = 128, enable ) )

/* Function definition. */
void Excep_PERIB_INTB128( void )
{
long lHigherPriorityTaskWoken;

    /* Interrupts are already enabled here.  See comment above. */

    /* xSemaphoreGiveFromISR() is an interrupt safe FreeRTOS function.  It is
    assumed the semaphore has already been created.  If giving the semaphore
    unblocks a task, and the task that is unblocked has a priority above the
    priority of the currently executing task, then the lHigherPriorityTaskWoken
    parameter will get set to pdTRUE inside the xSemaphoreGiveFromISR()
    function. */
    xSemaphoreGiveFromISR( xSemaphore, &lHigherPriorityTaskWoken );
    portYIELD_FROM_ISR( lHigherPriorityTaskWoken );
}
An example interrupt service routine using the Renesas compiler syntax
|
/* The function prototype uses the interrupt attribute. */
static void vT0_1_InterruptHandler( void ) __attribute__((interrupt));

/* Function definition. */
void Excep_PERIB_INTB128( void )
{
long lHigherPriorityTaskWoken;

    /* Unlike when using the Renesas compiler, interrupts must be explicitly
    re-enabled inside the interrupt service routine. */
    __asm volatile( "SETPSW	I" );


    /* xSemaphoreGiveFromISR() is an interrupt safe FreeRTOS function.  It is
    assumed the semaphore has already been created.  If giving the semaphore
    unblocks a task, and the task that is unblocked has a priority above the
    priority of the currently executing task, then the lHigherPriorityTaskWoken
    parameter will get set to pdTRUE inside the xSemaphoreGiveFromISR()
    function. */
    xSemaphoreGiveFromISR( xSemaphore, &lHigherPriorityTaskWoken );
    portYIELD_FROM_ISR( lHigherPriorityTaskWoken );
}
An example interrupt service routine using the GCC compiler syntax
|
It is suggested that a compare match timer is used to generate the tick interrupt, and an example implementation of vApplicationSetupTimerInterrupt() that uses compare match timer 0 is included in main.c within this demo application.