Right click on the project's name in the Eclipse Project Explorer window, then select 'Properties' from the pop up menu. The Properties window will open.
In the Properties window, select 'Resources->Linked Resources' to view the path variables. Click the 'New' button to create a new variable that will be used to point to the FreeRTOS source files directory tree.
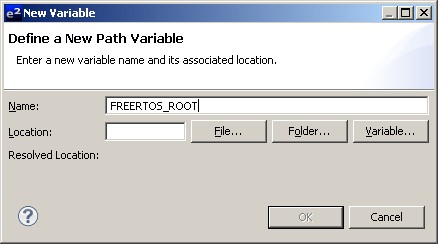
Define a new Eclipse variable
Name the new variable FREERTOS_ROOT, and use the pre-defined PROJECT_LOC
variable to enter a path that resolves to the /FreeRTOS/Source
directory.
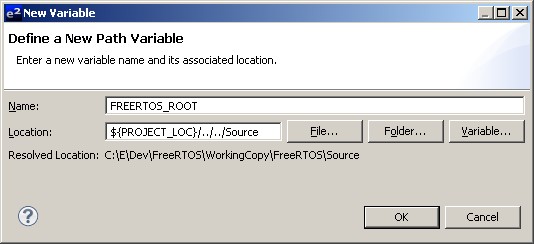
Extending the PROJECT_LOC variable so it resolves to the /FreeRTOS/Source directory
Close the Properties window.
Eclipse managed make projects build all the source files that appear in the Project Explorer window. The RTOS source files are outside of the Eclipse project directory, so don't automatically appear in the Project Explorer window, and must be added manually using a virtual folder.
Right click on the folder name in the Project Explorer under which you would like the RTOS source files to appear. Select 'New -> Folder'. The New Folder window will open.
In the New Folder window, enter FreeRTOS as the folder name, and select the 'Folder is not located in the file system (Virtual Folder)' radio button.
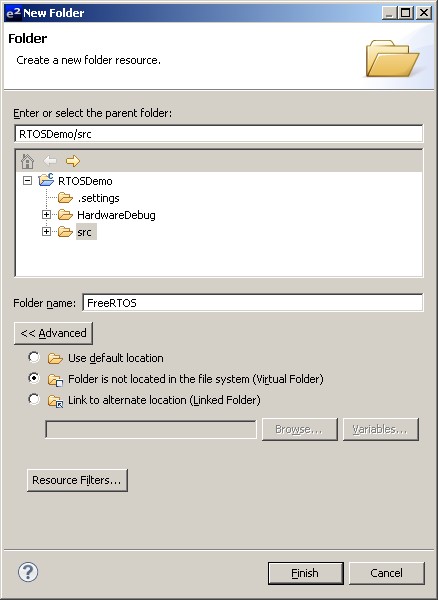
Creating a virtual folder in the Eclipse Project Explorer
Right click on the newly created virtual folder and select 'New -> Folder' from the pop up menu to bring up the New Folder window again.
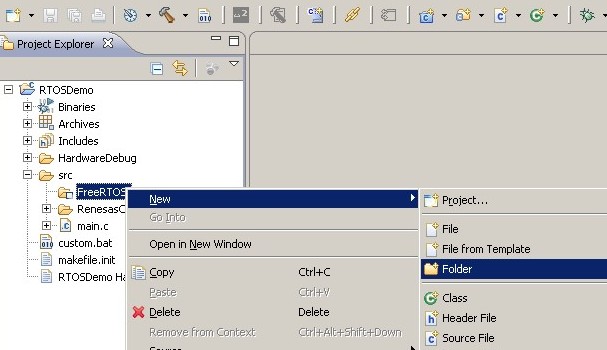
Right click the virtual folder in order to view the pop up menu
In the new folder window, enter Source as the directory name, and this time select the 'Link to alternative location (Linked Folder)' radio button. Enter the newly created FREERTOS_ROOT variable as the folder's location.
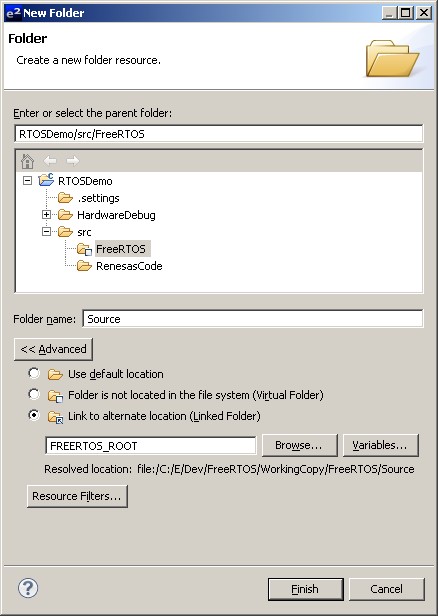
Using a relative path to add a linked folder into an Eclipse project
The FreeRTOS/Source directory is now visible within the Eclipse Project explorer. The directory contains the source files for every RTOS port, so the next step is to use Eclipse resource filters to ensure only the files necessary to build the FreeRTOS port actually being used are visible.
Right click on the Portable directory to view the pop up menu again, this time select 'Properties'. A pop up window that shows the proprieties of the Portable directory will be displayed.
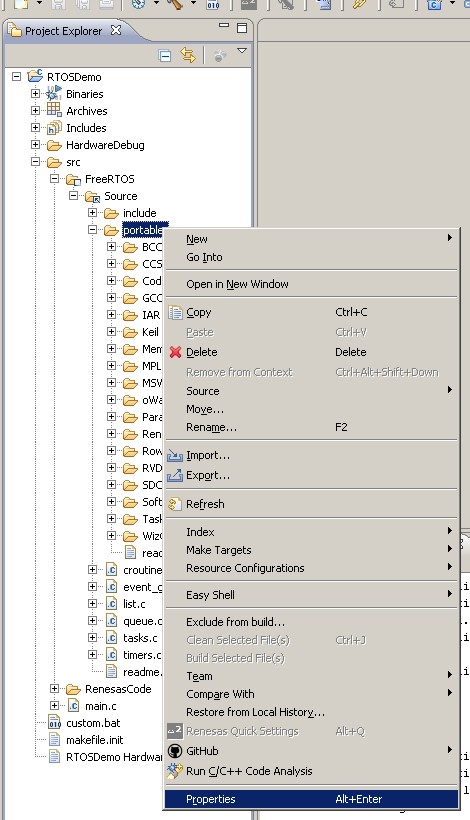
Viewing the properties of the RTOS Source code's Portable directory
In the Properties window, select 'Resources->Resource Filters' to view
the directory's resource filters. Create two 'Include Only' resource filters
so the only directories that are shown match the text 'MemMang' and '[compiler]',
where [compiler] is the compiler used to build the source files. By way of
example, the next
two images show the settings to use if the project is being built with the
Renesas compiler.
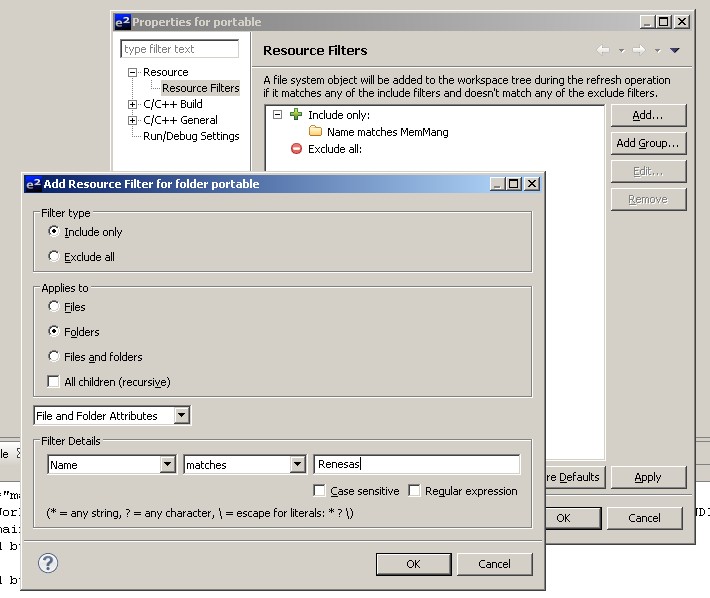
Defining 'Include Only' resource filters on the directories
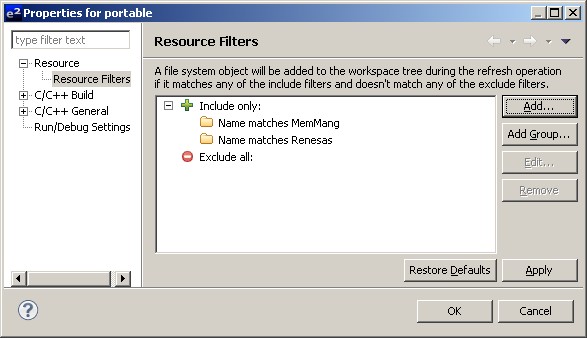
The Resource Filters window after the two filters have been defined.
At the time of writing, the MemMang directory contains four .c files,
each of which provides one of
four different options for heap memory management.
Add a resource filter to the MemMang directory
to ensure only one of the four .c files is visible.
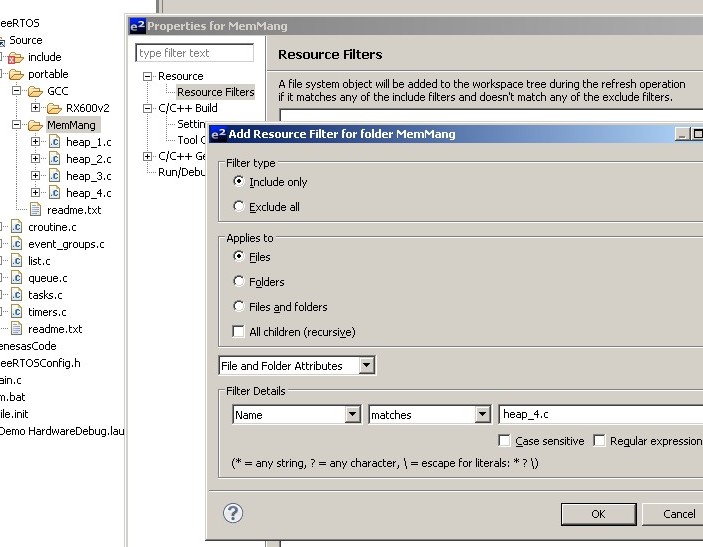
Using a resource filter to ensure only one heap_x.c file is built, heap_4.c in the depicted case
The [compiler] directory will contain a sub directory for each architecture
FreeRTOS supports with that compiler. Add a resource filter to the
[compiler] directory to ensure only the directory for the architecture
actually being used is visible. For example, the resource filter being
created in the image below is correct if the Renesas compiler is being
used to build a project that targets a microcontroller form the RX600 family.
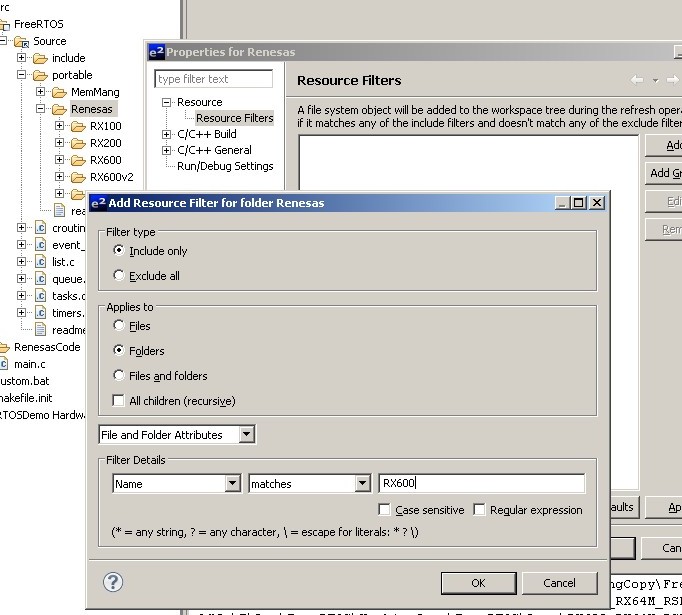
Creating a resource filter to ensure only one sub directory under the [compiler] directory is visible
Virtual and linked folders can be added to the compiler's include path in the normal way.
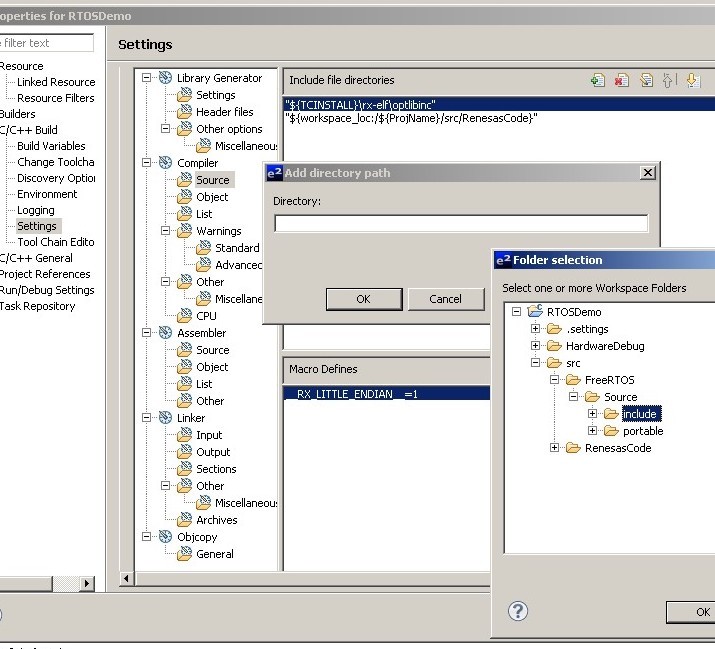
Adding directories from the virtual and linked folders into the compiler's include path