 |
|
|
This page documents the FreeRTOS demo application for the low power STM32L152 microcontroller from STMicroelectronics. The demo uses the IAR Embedded Workbench for ARM V6.10 from IAR Systems, and targets the official STM32L152-EVAL evaluation board from STMicroelectronics (instructions are provided should you wish to use an alternative development board).
Note: If this project fails to build then it is likely the version of IAR Embedded Workbench being used is too old. If this is the case, then it is also likely that the project file has been (silently) corrupted and will need to be restored to its original state before it can be built even with an updated IAR version.
The FreeRTOS state viewer plug-in is pre-installed in version 6.10, removing the requirement to install it manually.
The demo LCD task is the only task that is permitted to access the LCD. Other tasks and interrupts that want to write messages to the LCD do not do so directly, but instead by sending the message to the LCD task.
The demo LCD task also demonstrates the 'controller' task concept. Messages that are sent to the LCD contain both a message type and a message value parameter. The LCD task knows what to do with the message value (which can be an integer, character pointer, or anything else) by interpreting at the message type.
A demo button polling task uses the time delaying features of FreeRTOS to control the rate at which it reads a button input state. This removes the need for complex button debouncing, and prevents the task from utilising all of the available CPU time.
Slow output devices such as LCDs cannot normally be used efficiently from an interrupt service routine. In this demo the joystick select button is used to generate an external interrupt, and the interrupt service routine sends a string to the LCD indirectly by sending it to the LCD task on a message queue.
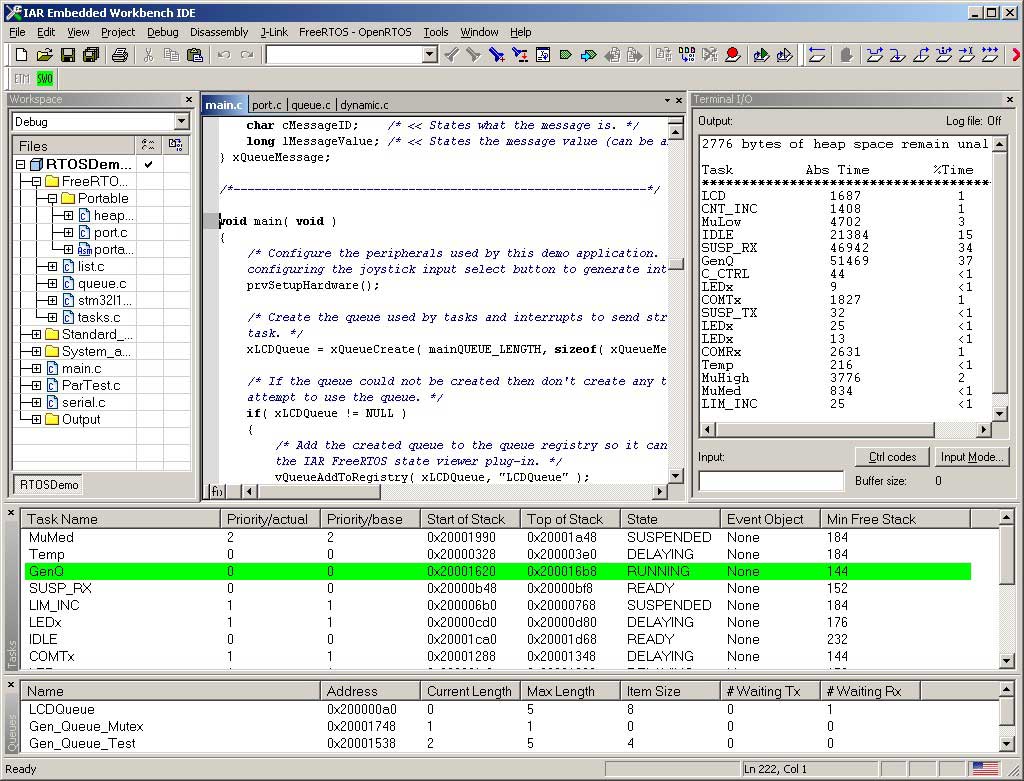
Run time statistics provide information on the amount of time each task has spent in the Running state. Times are given as an absolute value, and as a percentage of the total run time.
The priority of the USART3 Rx and Tx interrupts are set above the priority of any other interrupt used in the system (including the interrupts used by the RTOS kernel itself). The USART3 interrupts will therefore interrupt (nest with) any other interrupt.
The idle task hook is used to place the processor into a low power state. Note however that the demo is implemented using standard task implementations that are used by many different demos, and is therefore not optimised for low power operation. Lower power consumption would be achieved by converting polling tasks into event driven tasks, and slowing the tick interrupt frequency.
The tick interrupt hook is used to implement 'watchdog' type functionality. It monitors all the other tasks in the system to look for any unexpected behaviour. It then sends either a PASS or an error code status message to the LCD/Controller demo task. The LCD/Controller demo task uses the message type member of its received message to interpret the message as a status message, then uses the message value member of its received message to determine the status string to write to the LCD.
The malloc() failed hook will trap calls to pvPortMalloc() that fail because there is not enough FreeRTOS heap memory available for the allocation to complete. pvPortMalloc() can be called from application tasks, but is also called from FreeRTOS API functions that create tasks, queues and semaphores.
xPortGetFreeHeapSize() is called from a task (after the RTOS scheduler has been started), and outputs the amount of FreeRTOS heap memory that remains unallocated (and therefore available) to the terminal IO window within the IAR Embedded Workbench IDE.
See also the FAQ My application does not run, what could be wrong?
The IAR workspace file for the STM32L152 demo is called RTOSDemo.eww and is located in the FreeRTOS/Demo/CORTEX_STM32L152_IAR directory.
The demo application also uses all four LEDs that are built onto the STM32L152-EVAL board. Jumpers JP18 and JP19 must be closed (shorted) for LED3 and LED4 to be functional.
The port was developed and tested using a J-Link USB JTAG interface connected to CN8 on the target hardware. The evaluation hardware also provides a built in ST-Link debug interface that can be accessed using the USB connector marked ST-Link/CN11.
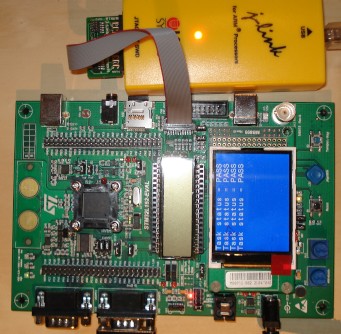
The following behaviour will be observed when the demo is executing normally:
This sets the frequency of the RTOS tick interrupt. The supplied value of 1000Hz is useful for testing the RTOS kernel functionality but is faster than most applications require. Lowering this value will improve efficiency.
See the RTOS kernel configuration documentation for full information on these configuration constants.
Attention please!: Remember that ARM Cortex-M3 cores use numerically low priority numbers to represent HIGH priority interrupts. This can seem counter-intuitive and is easy to forget! If you wish to assign an interrupt a low priority do NOT assign it a priority of 0 (or other low numeric value) as this will result in the interrupt actually having the highest priority in the system - and therefore potentially make your system crash if this priority is above configMAX_SYSCALL_INTERRUPT_PRIORITY. Also, do not leave interrupt priorities unassigned, as by default they will have a priority of 0 and therefore the highest priority possible.
The lowest priority on a ARM Cortex-M3 core is in fact 255 - however different Cortex-M3 vendors implement a different number of priority bits and supply library functions that expect priorities to be specified in different ways. For example, on the STM32 the lowest priority you can specify in an ST driver library call is in fact 15 - this is defined by the constant configLIBRARY_LOWEST_INTERRUPT_PRIORITY in FreeRTOSConfig.h. The highest priority that can be assigned is always zero.
It is also recommended to ensure that all four priority bits are assigned as being premption priority bits. This can be ensured by passing "NVIC_PriorityGroup_4" into the ST library function NVIC_PriorityGroupConfig(). In the demo project this is done from the function prvSetupHardware(), which is itself defined in main.c.
Each port #defines 'BaseType_t' to equal the most efficient data type for that processor. This port defines BaseType_t to be of type long.
Note that vPortEndScheduler() has not been implemented.
Note that portEND_SWITCHING_ISR() will leave interrupts enabled.
This demo project provides examples of FreeRTOS interrupt service routines - namely TIM6_IRQHandler() defined in main.c and USART3_IRQHandler() defined in serial.c. Note that USART3_IRQHandler() is implemented to stress the port and demonstrate queues being used from interrupts - it is not intended to be a demonstration of an efficient interrupt service routine!